
Bathroom Project
Freestanding Tub and Walk In Shower
An older bathroom taken back to the joists
This bathroom still had its original blue cast iron tub, pink walls and worn hexagon floor. The homeowners wanted a freestanding tub and a real walk-in shower, which meant the layout had to change rather than just the finishes.
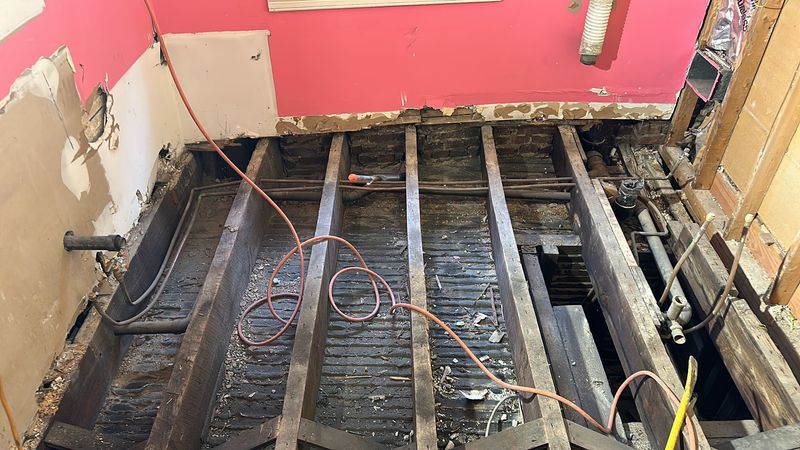
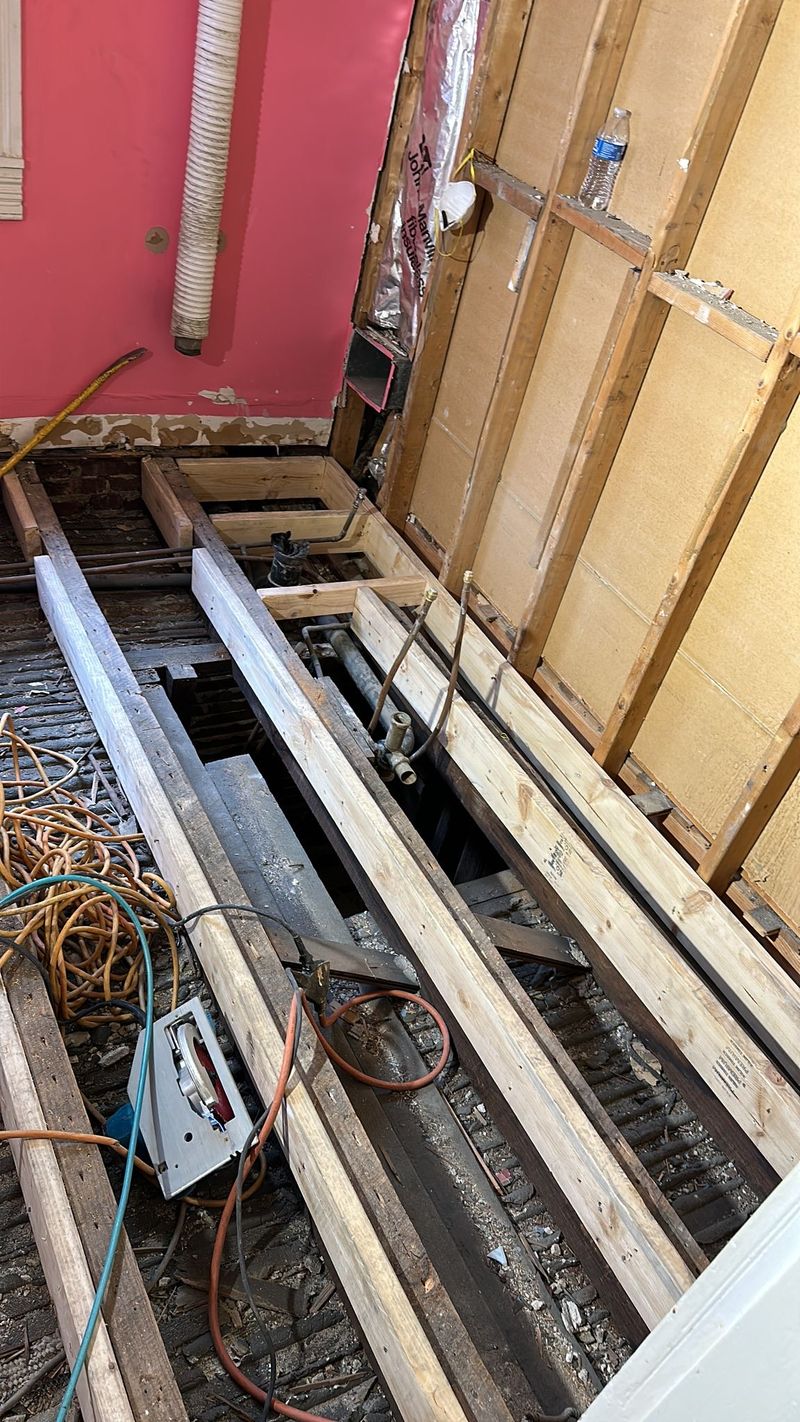
Once the floor came up, we found old joists that had to be reinforced by sistering new joists alongside them before anything else could move forward. Structural work like that is not what anyone plans for, but it is the difference between a bathroom that looks good and one that stays that way.
Start to finish: two weeks.
From Original Layout to Finished Room

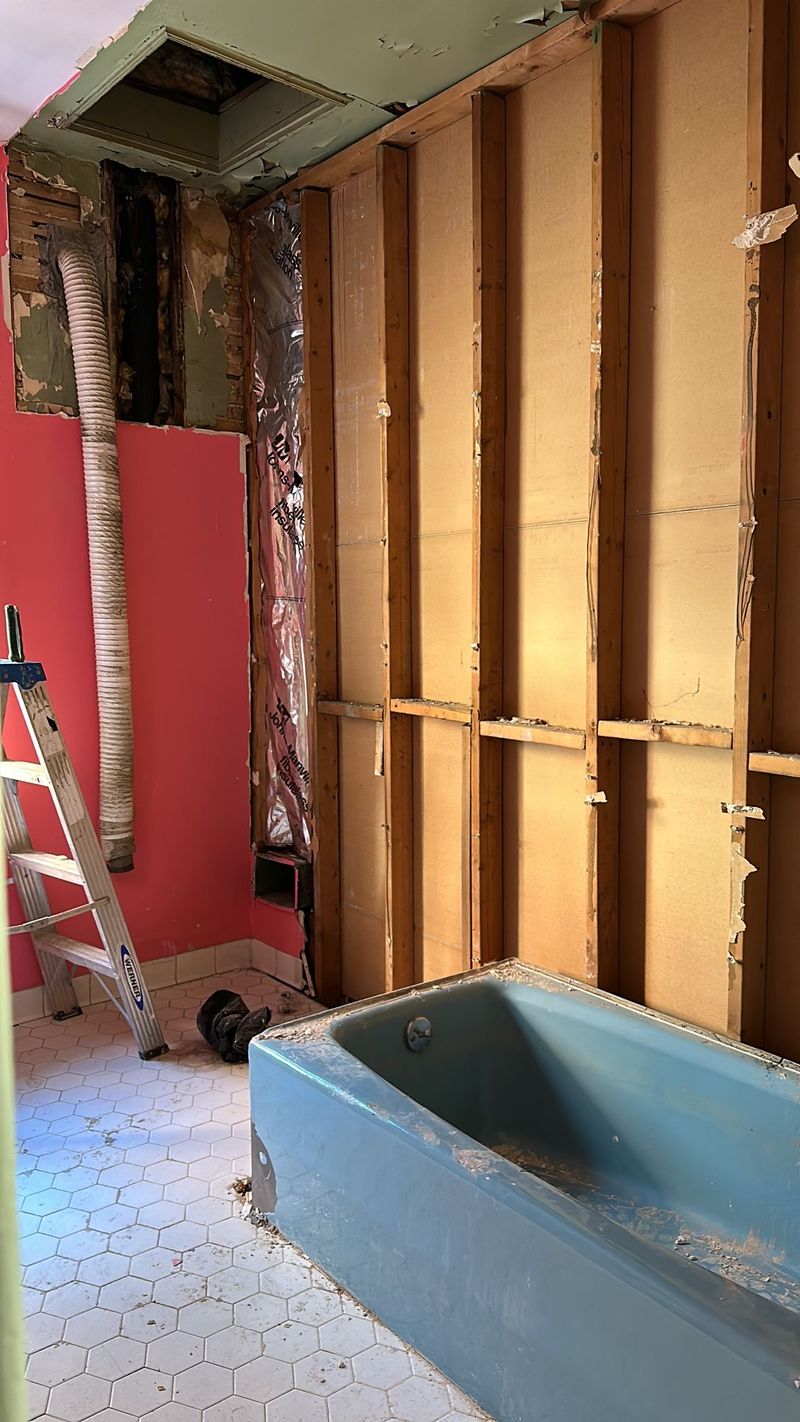

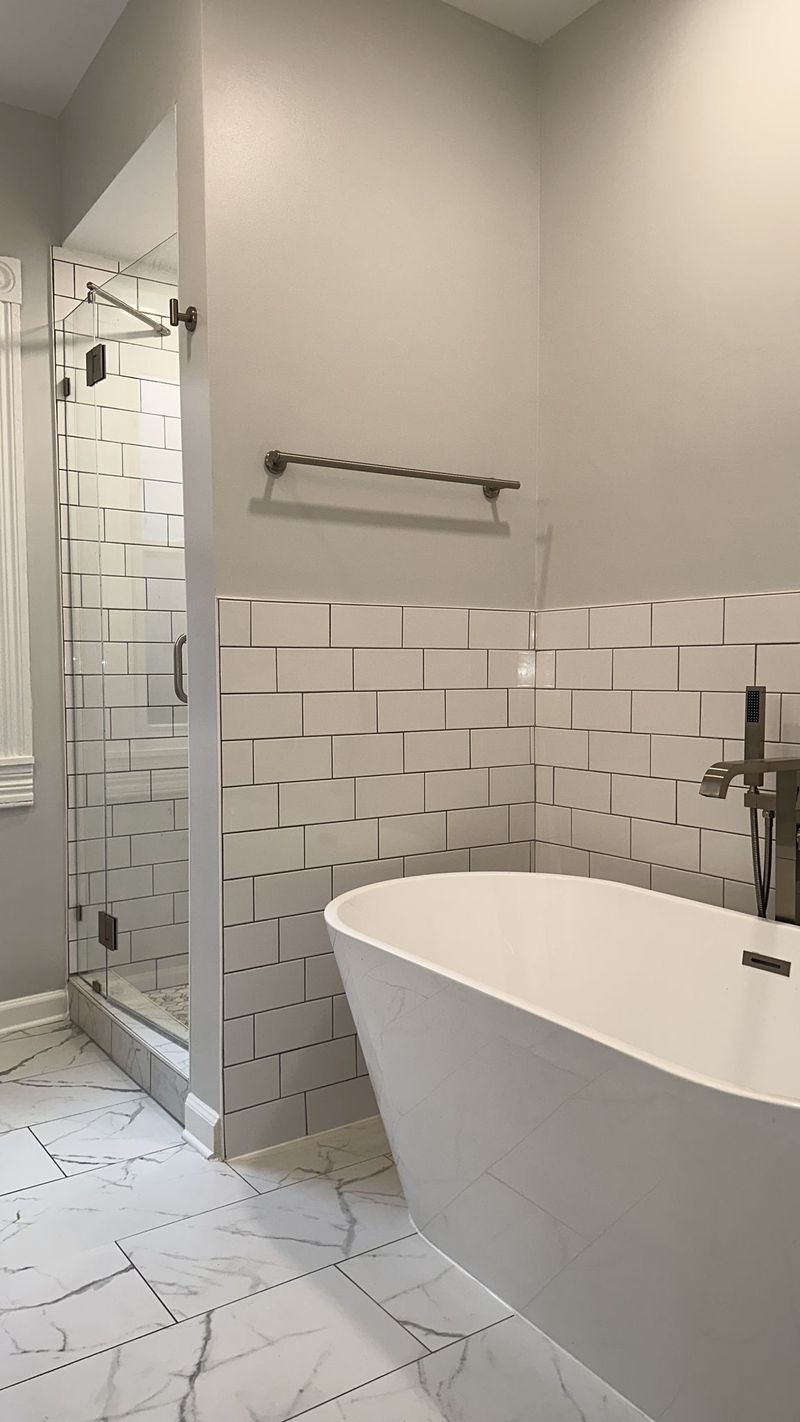
The wall on the left is new and created the separate walk in shower.
Six Steps
Construction Sequence
The finished tile and glass depend on careful work below the visible surfaces. These photographs follow the room from demolition through completion.
 01
With the tile and subfloor removed, the original joists and old plumbing were fully exposed. Several joists had deteriorated and were reinforced by sistering new joists alongside the originals before any new work could go down.
 02
New joists sistered alongside the originals, with the original joists left in place, and the supply and drain lines updated while the floor was open. This is the only time in a project when this work is straightforward, so it is worth doing properly.
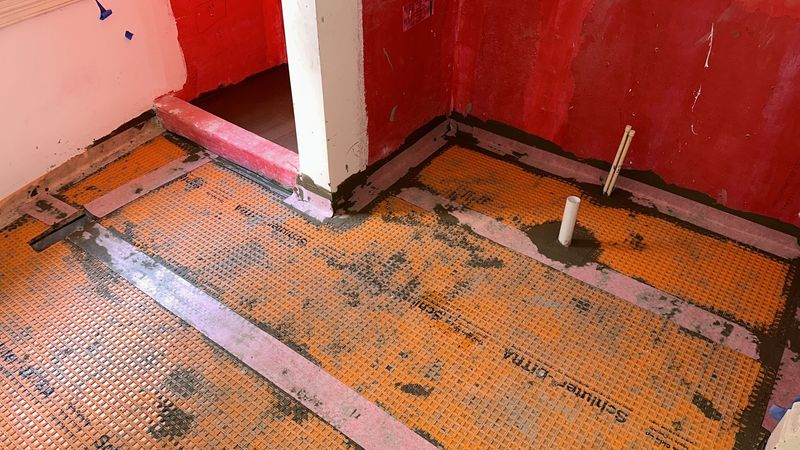 03
Schluter Ditra goes down over the new subfloor before any tile. It separates the tile from the movement of the structure below, which is the single biggest reason tile cracks or lifts years later.
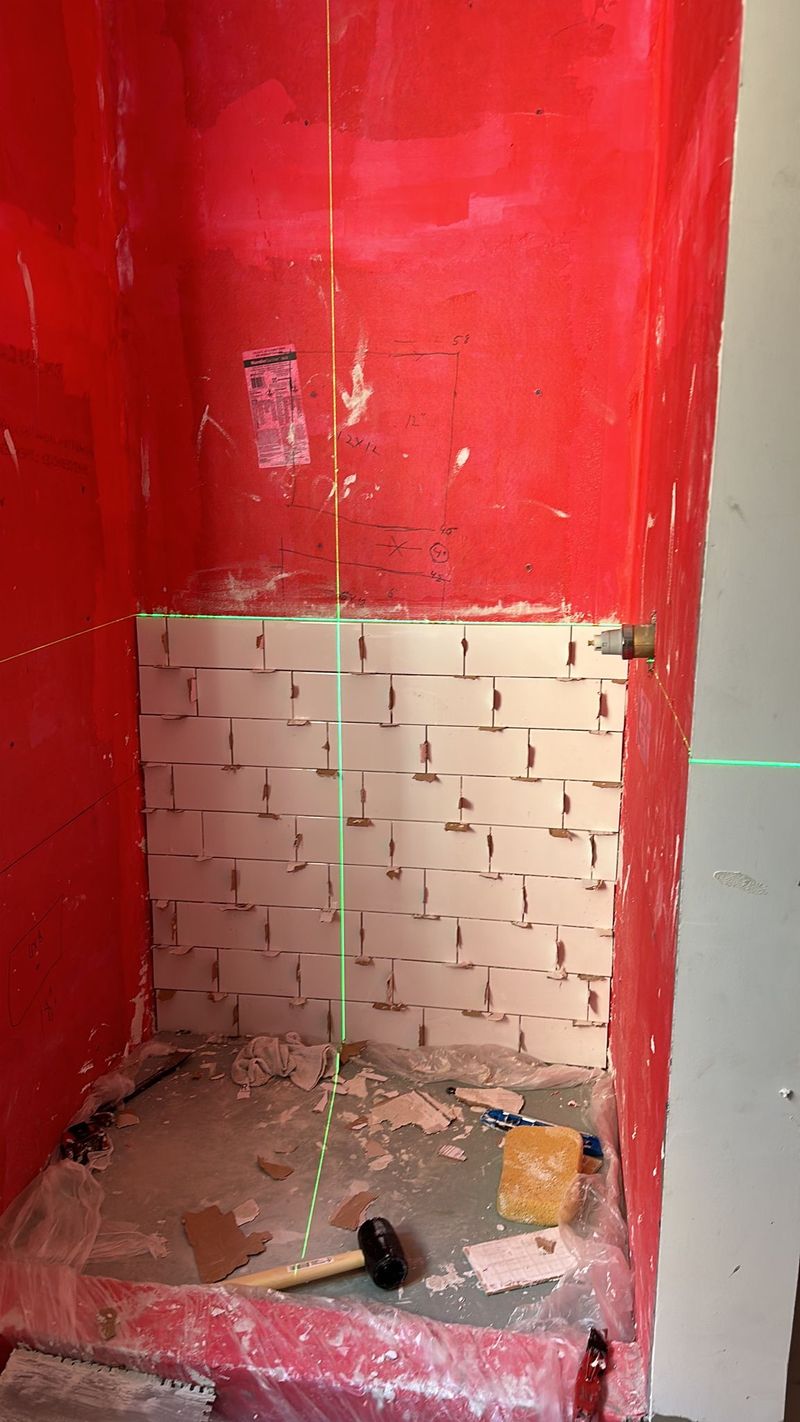 04
Tile lines are established before the first piece goes on the wall. Planning the layout means cuts land where they are least visible, and the courses stay level across corners and around the niche.
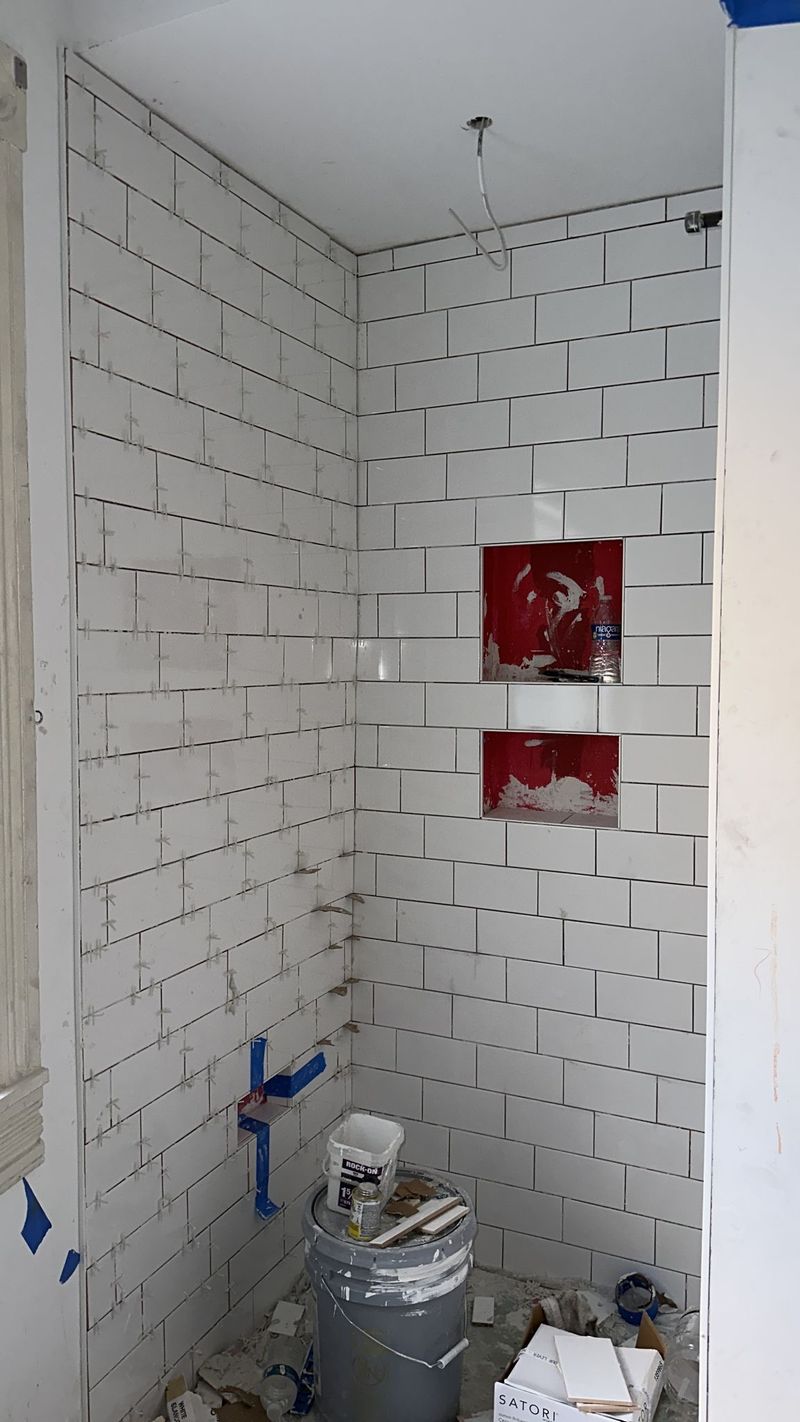 05
Spacers and leveling clips hold each course while the mortar sets. The niches are left open until the surround is complete, so the tile around them lines up rather than being cut to fit.
Completed


The Result
Two Bathing Areas with Clear Separation
The new dividing wall gives the walk in shower its own enclosure while keeping the freestanding tub open to the room. White subway tile and marble look flooring connect both areas as one finished space.
Start a Conversation
Plan Your Bathroom Renovation
Tell us what is not working in your current bathroom and what you want the finished room to make possible.
Get a Free Quote“Avi was so easy to communicate with and kept us in the loop every step of the way, especially when they had to take the room down to the studs to repair the old floor framing. The final results are flawless.”